How To Add, Edit or Delete a Defect
Add/Edit a Defect
1
Go to a report you are editing.
2
You can add defects both in inspection areas and items.
3
To add a defect into an inspection area, click the area to where you wish to add the defect. Likewise under inspection area, click an item to where you want to add a defect.

4
Go to Do you see any issues? part of the page.
5
Click Add Defect.

6
Add a description of the defect.
7
Add photographs of the defect.
8
Click Save defect.
9
If you wish to edit the defect whilst the report is in progress, simply tap the defect again to begin editing the description and photos. Tap Save defect to save the changes.

Delete a Defect
1
To delete a defect, find the defect you wish to remove.
2
Next to the heading Do you see any issues?, tap the green EDIT button.
3
Tap the red circle to bring up a Delete option.
4
Select the red Delete button and then confirm by tapping Delete again. Once deleted, the defect cannot be recovered.
In HelloReport Web App
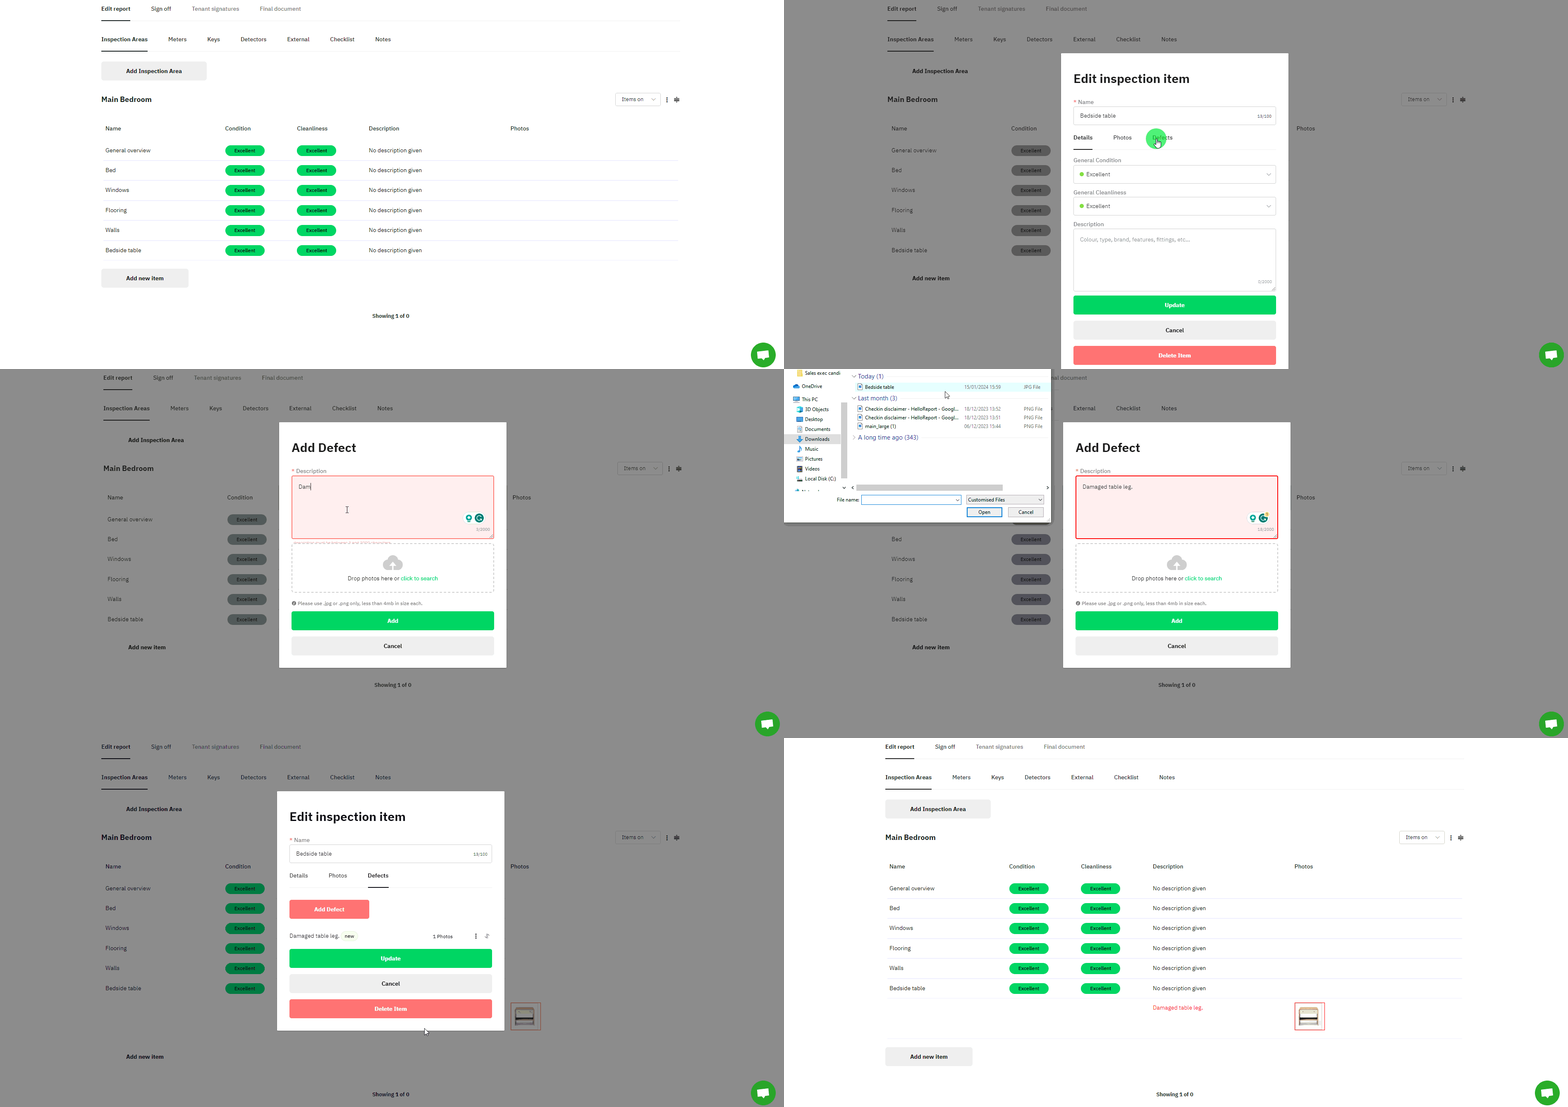
Add Defect
1
To add a defect, click anywhere on the row of the item/area you need to add a defect; the name, condition/cleanliness, description etc.
2
An edit menu will pop up - go to Defects and click the red Add Defect button.
3
Add as much detail about the defect as possible. Drag/drop photos to the dotted box, or click to browse files.
4
Once done, select Add and then Update to save the changes.

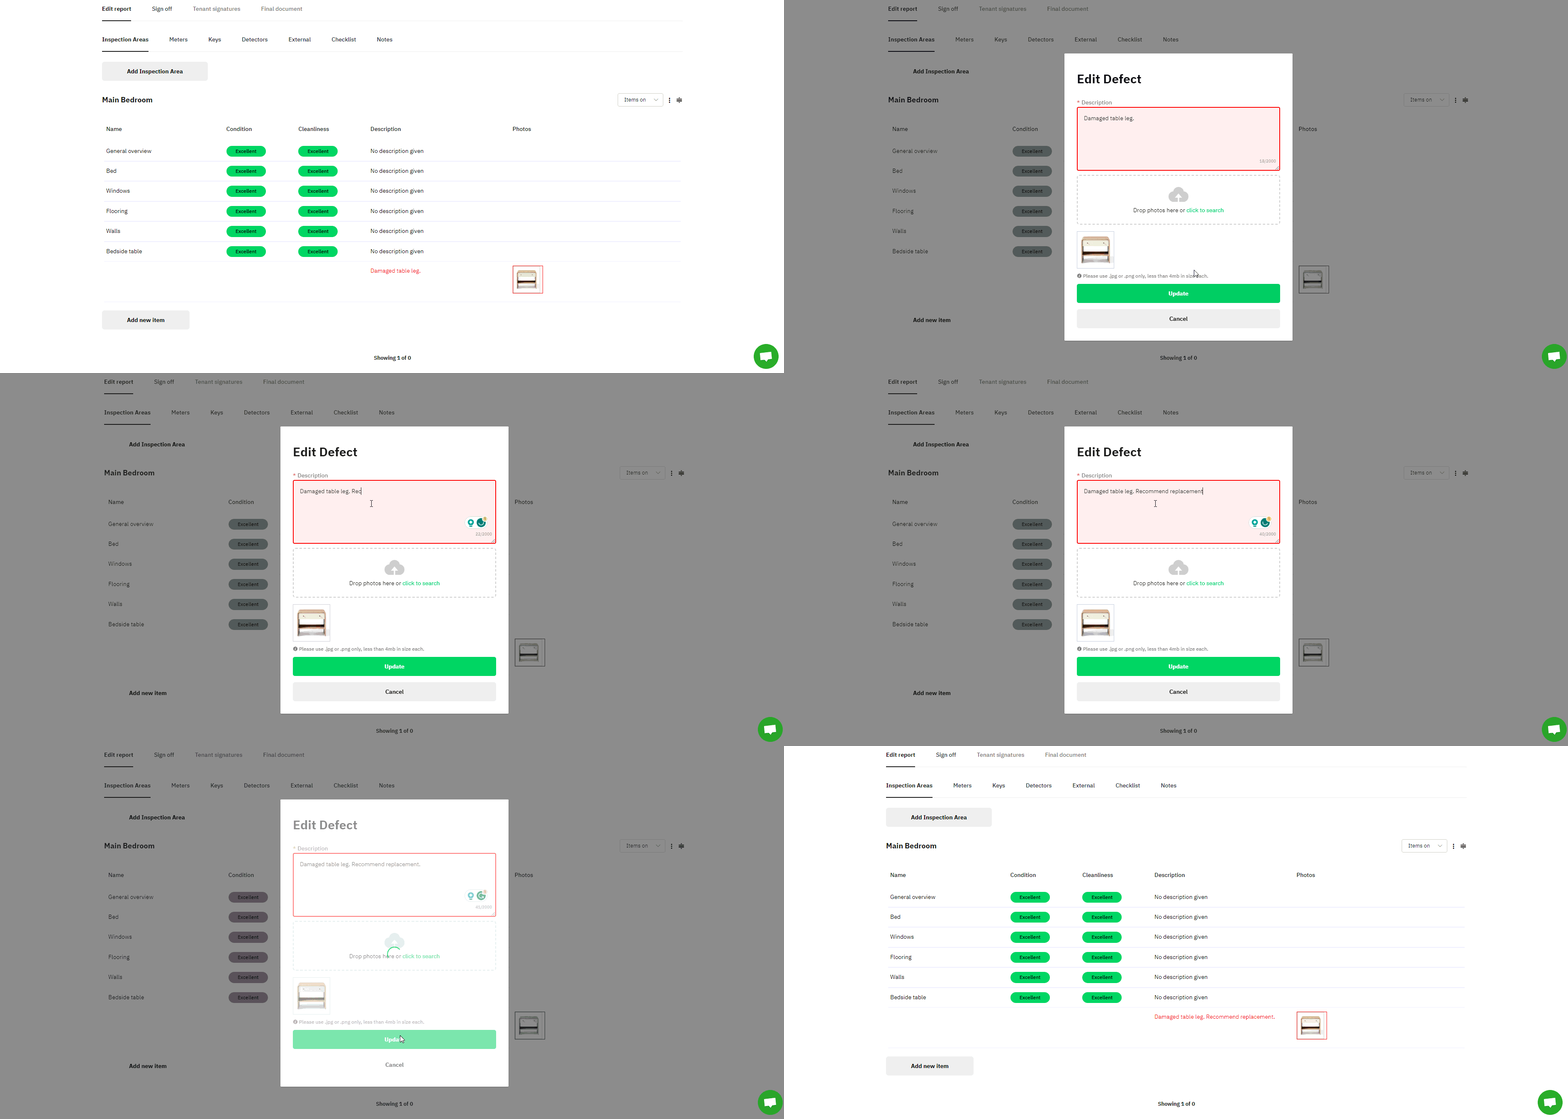
Edit Defect
1
To edit a defect, you can click the red description text to edit the description/photos directly. Update to confirm changes.
2
Alternatively, click anywhere on the row of the item/area and then click to the Defects tab.
3
Go to the 3 black dots > Edit to make changes.
4
Hold down on the arrow icon directly next to this to drag and re-order the defects on the report.

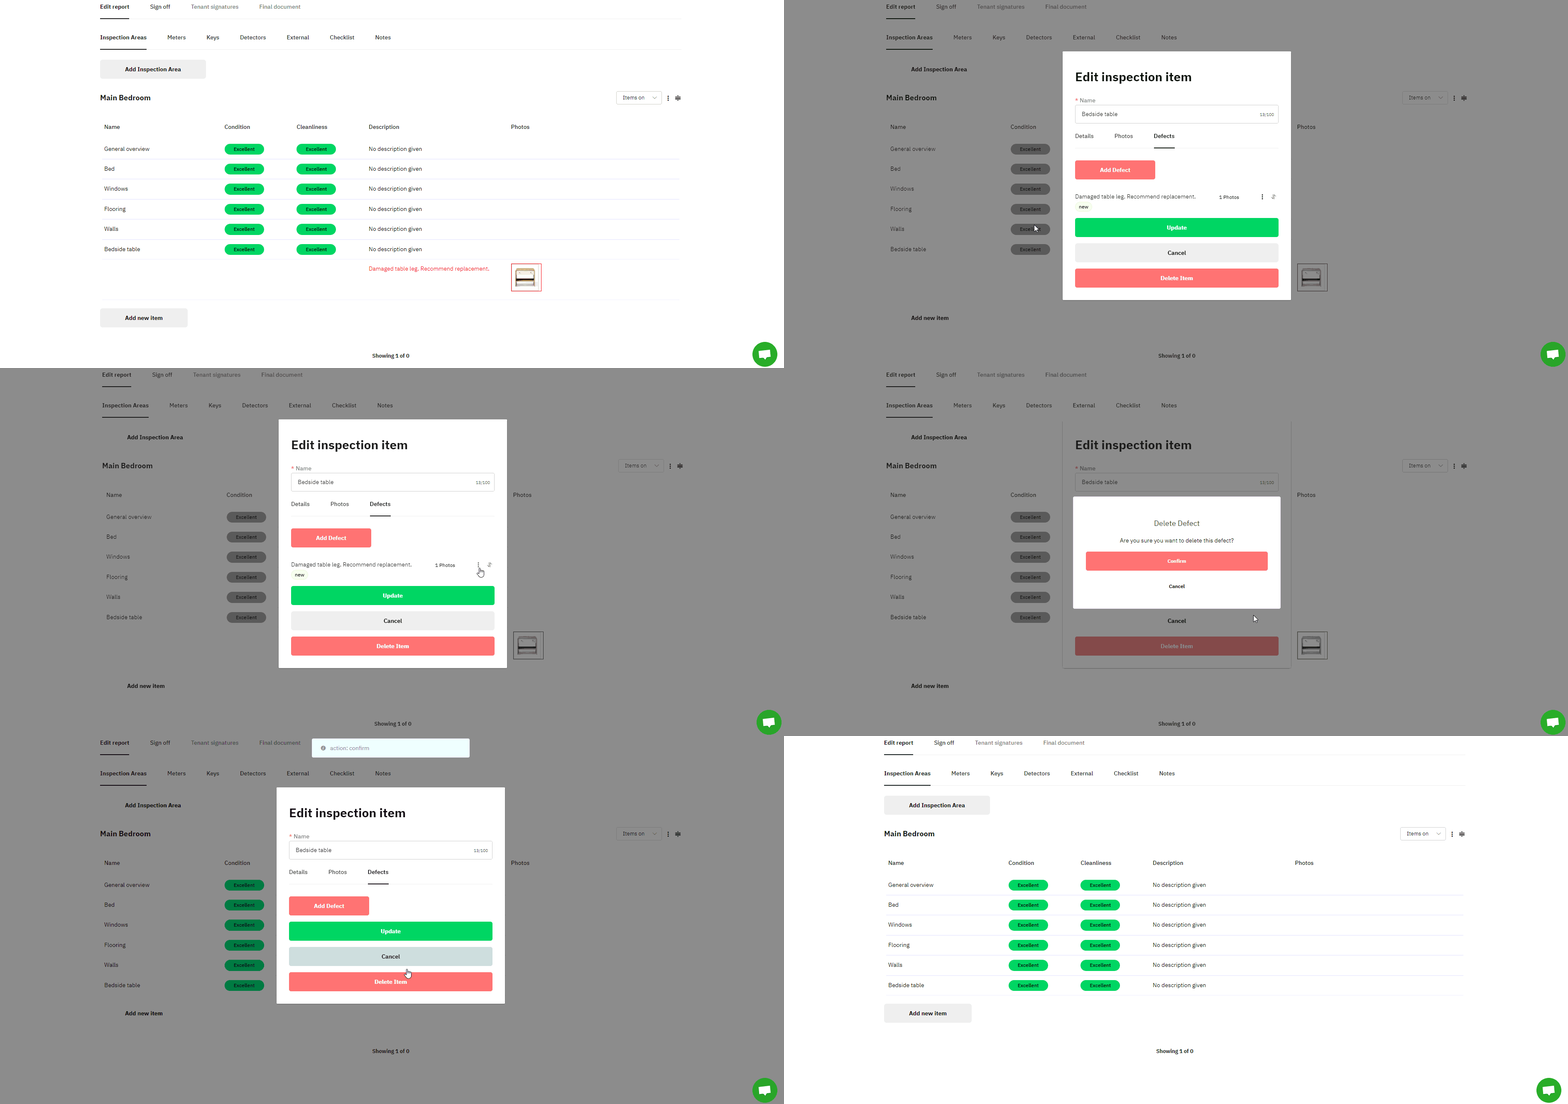
Delete Defect
1
Click anywhere on the row of the item/area where you need to delete the defect.
Avoid clicking on the red defect text - there's no option to remove the defect this way, only edit/add photos.
2
Click to the Defects tab.
3
Go to the 3 black dots > Remove.
4
Confirm to delete and then Update to see the changes on the report.

Updated on: 15/01/2024