Add, Edit, Duplicate and Delete Inspection Areas
Add An Inspection Area
1
Go to a report you are editing.
2
Click Add Inspection areas under the list of inspection areas already in your report.

3
Choose the inspection area from the list provided.
4
If you can't find the area you require from the list, click Add custom in the top right corner.

5
If you click Add custom, add a unique name to your area.
6
Provide the Condition and Cleanliness ratings to the area. Note that these can be changed later.
7
Slide Items on and off depending on if you require them. You will then be given the option to Add items.

8
If you would like to use this inspection area in the future, slide Add this to your dictionary on.
9
Finalise by clicking Add inspection area.

Edit The Name of An Inspection Area
1
Go to the inspection area you wish to edit.
2
Simply double tap the name of the inspection area to bring up the keyboard.
3
Erase the name and replace it with the custom name of your choice.
4
Any changes will save automatically.
Duplicate An Inspection Area
1
Click Edit at the right top corner of the inspection areas list.
2
Click the copy symbol (two squares on top of each other) after the area you wish to duplicate.
3
The duplicated area will appear at the end of the inspection areas list.
4
To finish, click Done.
Delete An Inspection Area
1
Click Edit at the right top corner of the inspection areas list.
2
Choose all the inspection areas you wish to delete, by clicking the red - mark.
3
To confirm your delete, click Delete.
4
When you have deleted all of the areas you want, click Done.
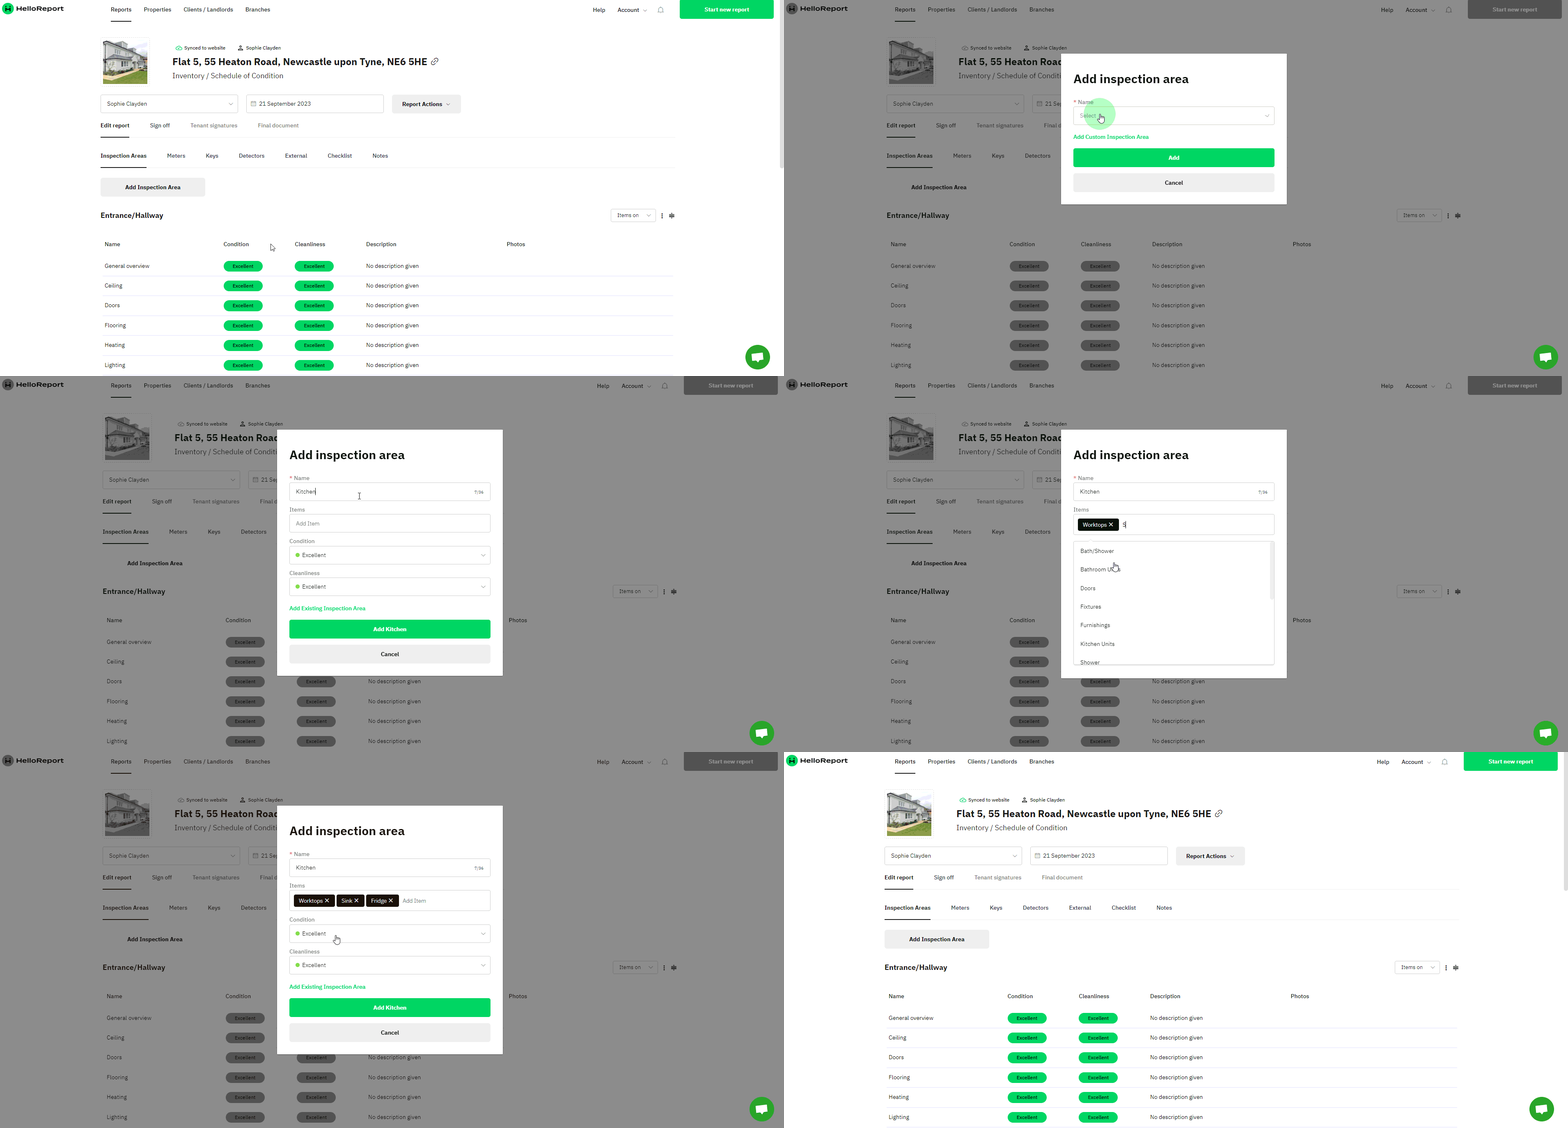
In HelloReport Web App
Add An Inspection Area
1
Go to a report you are editing.
2
Click Add Inspection Area towards the top of the report.

3
Choose the new inspection area from the list provided or Add Custom Inspection Area.
4
Name your new inspection area as you wish.
5
Add items and give a condition and cleanliness rating to your new area, however these can be changed later.
6
Click Add Inspection Area towards the top of the report.
To see how to add custom items to areas, read instructions in this help article: Add, edit and delete items.

Edit The Name of An Inspection Area
1
Click on General overview.

2
Edit the name of the inspection area and confirm by clicking Update.

Duplicate An Inspection Area
1
Click the three vertical dots.
2
Select Duplicate. The area will then be duplicated at the end of the report.

To find out more about re-ordering the inspection areas, read instructions in this help article: Re-order areas and items on the web app.
Delete An Inspection Area
1
Click the three vertical dots.
2
Select Delete and Confirm.

Updated on: 17/11/2023